How to Make Laser Cut Wood Signs?
When it comes to choosing wood for laser cutting, it’s important to consider factors such as the type of wood, its thickness, and its suitability for laser cutting.
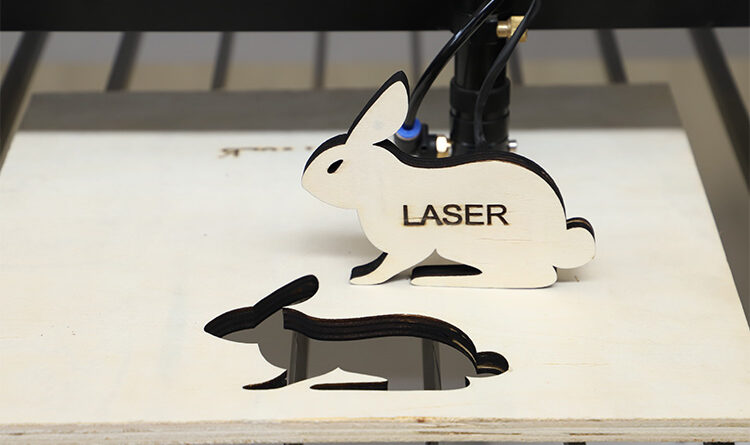
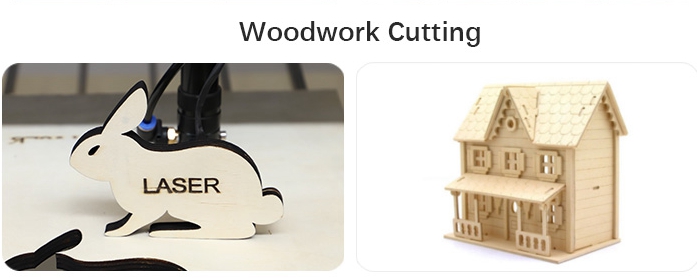
With a laser cutter for wood, a CO2 laser machine means with sufficient laser power to burn through the wood. The thicker and more compact the wood you want to laser cut, the more laser power you need. The edges often look a bit dark / charred, but this can be reduced to a minimum with simple post-processing steps. You can also engrave with the same laser machine. The combination of both laser cutting of wood and laser engraving of wood offers many interesting possibilities. With a laser cutter for wood, a CO2 laser machine means with sufficient laser power to burn through the wood. The thicker and more compact the wood you want to laser cut, the more laser power you need. The edges often look a bit dark / charred, but this can be reduced to a minimum with simple post-processing steps. You can also engrave with the same laser machine. The combination of both laser cutting of wood and laser engraving of wood offers many interesting possibilities.
Here are some popular wood options commonly used for laser cutting
- Plywood: Plywood is a popular choice for laser cutting due to its consistent thickness and stability. It typically consists of multiple thin layers of wood glued together, resulting in a strong and uniform material. Birch plywood is a common choice, as it cuts cleanly and has a smooth surface.
- MDF (Medium-Density Fiberboard): MDF is a composite wood product made from wood fibers and resin binder. It is dense, flat, and smooth, making it an excellent choice for laser cutting. MDF cuts well and produces clean edges, although it can produce more smoke and odor compared to other woods.
- Hardwood: Various hardwoods can be used for laser cutting, including maple, cherry, walnut, and oak. Hardwoods are known for their durability and attractive grain patterns. They can result in high-quality laser-cut products with intricate details. However, hardwoods tend to be more expensive than plywood or MDF.
- Balsa Wood: Balsa wood is a lightweight and soft wood that is easy to cut with a laser. It is often used for prototyping or creating models due to its low density and ease of manipulation. Balsa wood is not as strong as other woods, so it may not be suitable for structurally demanding applications.
- Bamboo: Bamboo is a sustainable and environmentally friendly wood option for laser cutting. It has a distinctive grain pattern and cuts well with a laser. Bamboo is often used for decorative items, signage, and crafts.
Advantages of a laser cutter for wood
Precise and detailed cuts
A laser cutter for wood offers extremely precise and detailed cuts. The concentrated laser beam can cut through wooden materials with precision, creating clean and perfect contours. Whether cutting complex shapes, engraving fine details or creating personalized designs, a laser cutter ensures a professional result.
Versatility in design options
With a laser cutter for wood, the design possibilities are virtually endless. You can create intricate patterns, unique shapes and personalized details that are difficult to achieve with traditional cutting methods. This allows you to give free rein to your creativity and create unique wooden products that stand out.
Minimal material waste
A laser cutter uses a focused laser beam, which allows you to cut very accurately and minimize material waste. The ability to make precise cuts means you get the most out of your wood materials and produce less waste. This not only results in cost savings, but is also more environmentally friendly.
Efficiency and time saving
A laser cutter for wood ensures efficiency and time savings. The automated process allows fast and consistent cutting, increasing productivity. In addition, laser cutters can make multiple cuts simultaneously, allowing you to achieve more in less time. This is especially useful for companies and professionals who need to cut large volumes of wood.
No physical contact with the material
Unlike traditional cutting methods such as sawing or milling, a laser cutter for wood does not make physical contact with the material. This minimizes the risk of damaging the wooden surface and reduces the need for finishing. The result is a smooth and clean cutting surface without splinters or burrs.
Automation and precision repetition
Laser cutters for wood integrate with computer-controlled systems, allowing you to make accurate and repeatable cuts. This is especially beneficial when producing identical wooden parts or when undertaking large-scale projects. The ability to consistently repeat precise cuts ensures high-quality production and minimizes errors.
With these advantages, a laser cutter for wood offers unprecedented possibilities for precision, creativity and efficiency in the processing of wooden materials. It is a valuable tool for woodworkers, furniture makers, modellers and other professionals in the wood industry.
Steps to Make Laser-Cut
- Wood Signs: Design Your Sign: Use design software to create or import your sign design. You can add text, images, or any other elements you want on your sign. Ensure your design is in vector format (e.g., SVG, DXF, AI) for compatibility with the laser cutter.
- Select Your Wood Material: Choose the type of wood you want to use for your sign. Plywood and MDF are common choices for laser cutting due to their consistent density and smooth surface. Make sure the wood sheet is the appropriate thickness for your design.
- Prepare the Laser Cutter: Set up the laser cutter and ensure it’s properly calibrated. This includes focusing the laser beam and setting the correct power and speed settings based on the wood type and thickness. Consult the user manual for your specific laser cutter for guidance.
- Load the Wood Sheet: Secure your wood sheet to the laser cutter’s bed to prevent movement during the cutting and engraving process. Use clamps or masking tape to hold it in place. Ensure the wood sheet is level and flat.
- Import Your Design: Use the laser cutter’s software to import your design file. Position it on the wood sheet where you want the laser cutting and engraving to occur. Make sure it fits within the working area of the laser cutter.
- Set Cutting Parameters: Configure the laser cutter settings, including power, speed, and resolution. These settings will determine the depth and precision of the cuts and engravings on the wood. Experiment with test cuts if necessary.
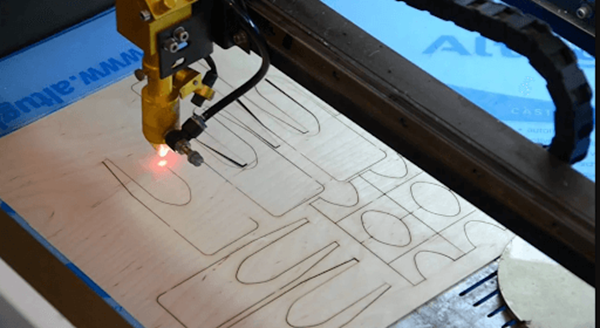
- Run the Laser Cutter: Start the laser cutter and let it work through your design. The laser will cut along the designated paths and engrave the areas specified in your design. Be vigilant and monitor the machine to ensure it operates safely and as expected.
- Ventilation and Safety: If your wood type generates fumes or odors during laser cutting, ensure proper ventilation and use safety equipment like a fume extractor or mask to protect yourself.
- Remove the Finished Sign: Once the laser cutter has completed its work, carefully remove the finished wood sign from the machine. Be cautious as the wood may still be hot.
- Finishing Touches: Depending on your design, you may want to paint or stain the wood, add hanging hardware, or perform other finishing touches to complete your sign.

Leave a Reply
You must be logged in to post a comment.